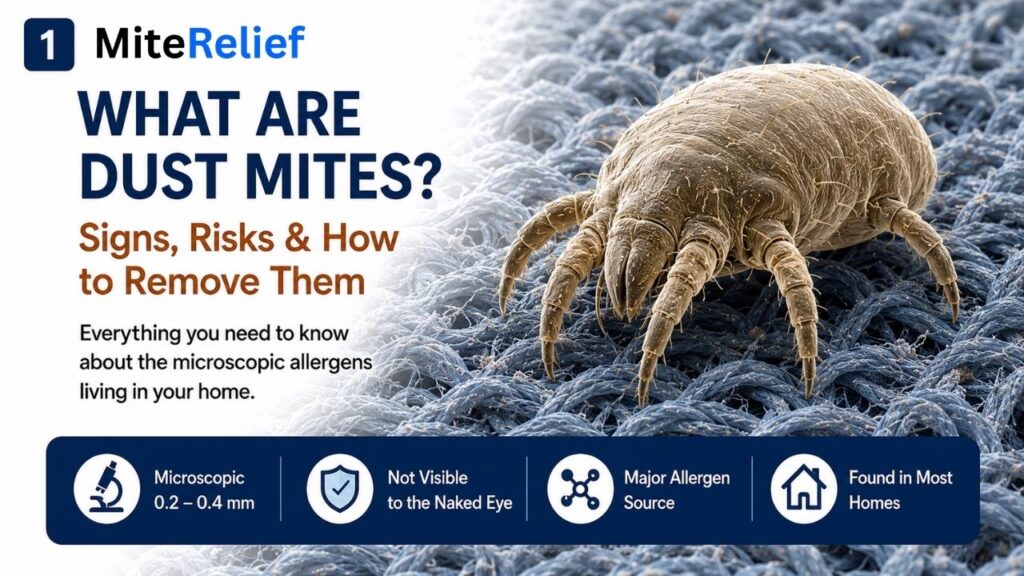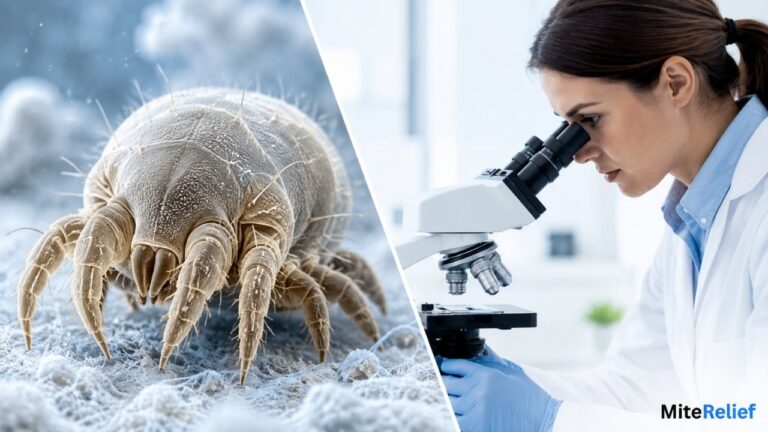
You can’t see dust mites with your bare eyes. They’re just too small. But put a microscope for dust mites to use, and a whole hidden world opens up.
Under the right lens, these tiny creatures show off their legs, hairs, and body shape in surprising detail. What looks like plain dust to the eye can hold living, moving mites once you focus a lens on it.
In this guide, you’ll learn what dust mites look like up close, how much magnification you need, and how to view a sample yourself. We’ll also cover what can be mistaken for a mite, so you know exactly what you’re looking at.
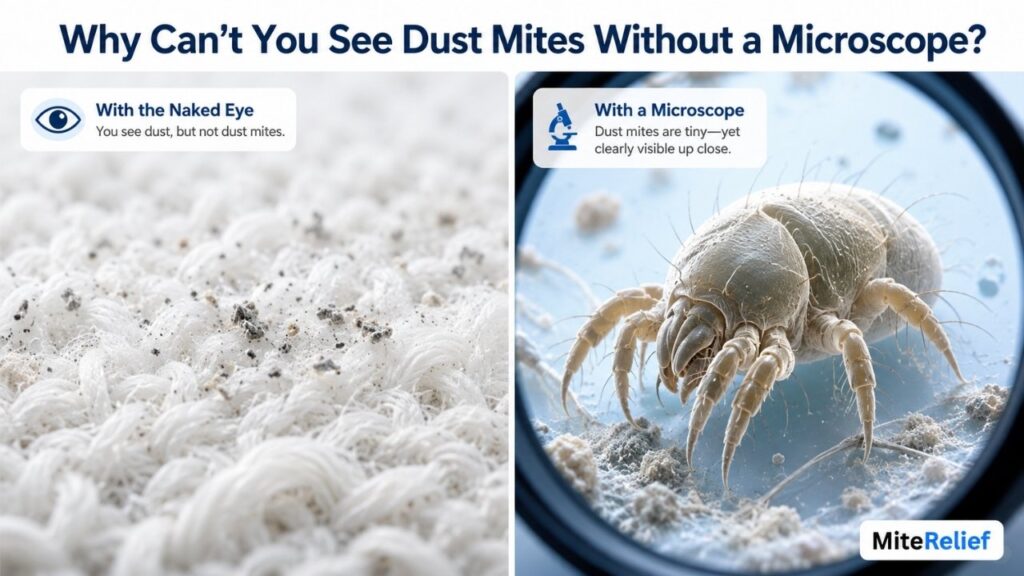
Why Can’t You See Dust Mites Without a Microscope?
Your eyes are amazing, but they have limits. Objects smaller than a fraction of a millimeter are difficult to see clearly without magnification. Dust mites are much smaller than that.
An adult house dust mite measures around 200 to 300 micrometers long. That’s smaller than the tip of a pin. No matter how hard you squint, your naked eye can’t pick out that kind of detail.
This is why a dust mite microscope matters so much. It bends and focuses light in a way your eye can’t, blowing up tiny shapes into something you can actually study. Even a low-cost lens can turn a fuzzy speck into a clear, recognizable creature.
It also helps to know the difference between plain dust and an actual mite. Regular house dust is a mix of skin flakes, fibers, and dirt.
A mite has a distinct body structure, legs, and features that separate it from ordinary dust particles, and only magnification can show you that difference clearly.
Without that extra help from a lens, dust mites and ordinary dust particles blend into the same gray haze. That’s part of why so many people never realize how many mites are actually present in a small pinch of dust.
Before viewing them under a microscope, it helps to understand what dust mites are and where they are commonly found, which you can read about in What Are Dust Mites?.
What Do Dust Mites Look Like Under a Microscope?
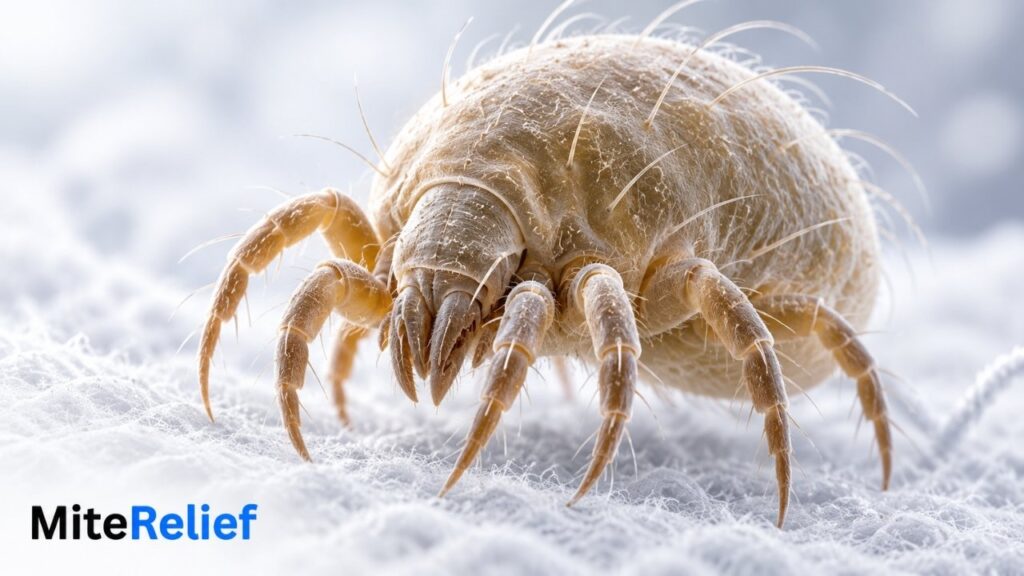
Once you view dust mites under a microscope, their shape becomes obvious right away. They no longer look like specks of dirt. They look like small, pale bugs.
Here’s what a dust mite looks like under a microscope, piece by piece:
- Body shape: An oval, somewhat round body, wider in the back than the front
- Legs: Eight jointed legs, since dust mites are arachnids, not insects
- Body colour: A pale, almost see-through, translucent body
- Hairs: Tiny setae, or fine body hairs, sticking out along the surface
- Body sections: Two main parts: the gnathosoma (head area with mouthparts) and the idiosoma (the larger main body)
- Mouthparts: Small feeding parts near the front, used to break down skin flakes
The gnathosoma sits at the front of the mite and holds the mouthparts. The idiosoma makes up most of the body and holds the legs, and it’s usually the part people notice first under a lens.
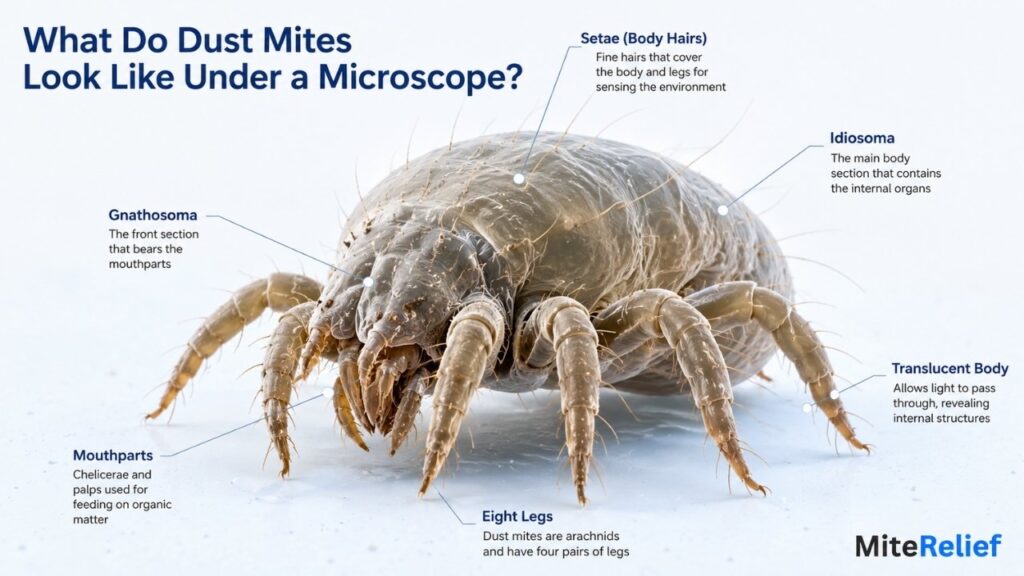
A magnified dust mite can also reveal signs it left behind. You might spot tiny eggs, which look like small, smooth ovals, or fecal pellets, which appear as tiny dark or light specks scattered near the mite itself.
These pellets are often more visible than the mites themselves, since a single mite can produce many of them over its lifetime.
Together, these details give you a much clearer picture than any drawing or photo alone.
This kind of close-up view goes far beyond a general dust mite appearance guide, since a microscope shows details that aren’t visible otherwise.
Once you know what to look for, spotting a mite in a new sample becomes much faster.
What Magnification Do You Need to See Dust Mites?
Not every microscope shows the same amount of detail. The right magnification depends on what you want to see.
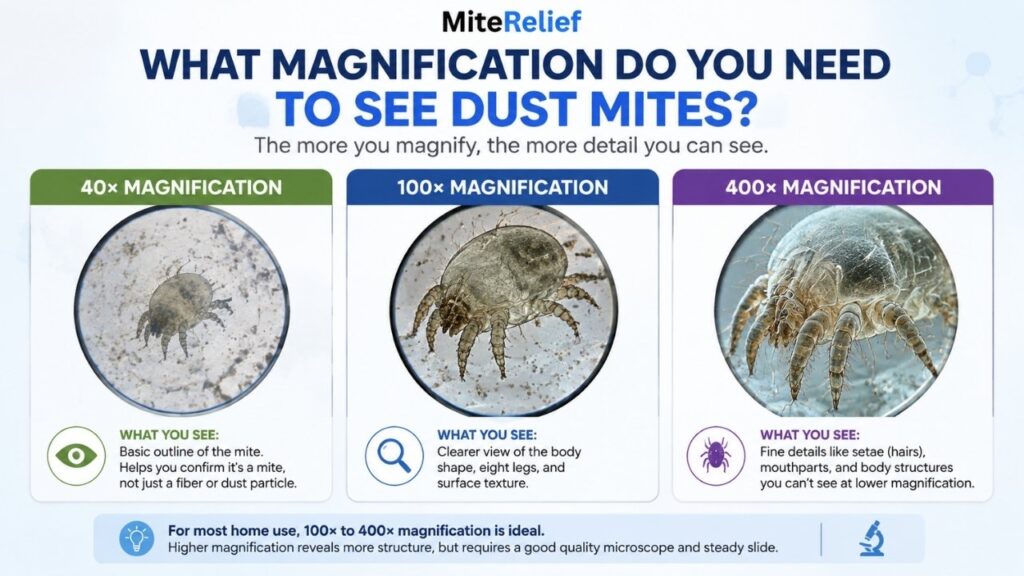
40× Magnification
At 40 times magnification, you can pick out a basic mite outline. You’ll be able to confirm that what you’re looking at is actually a mite and not just a fiber or dust particle.
100× Magnification
At 100×, things get sharper. You can start to make out the legs, general body shape, and some surface texture.
200×–400× Magnification
This range shows the finest details. You can spot individual setae, tiny hair-like structures, and other fine anatomical features that lower settings can’t capture.
Most home users rely on a basic optical microscope or a compound microscope with an objective lens and eyepiece.
Some people also use a digital microscope, which displays the image on a screen instead of through an eyepiece.
For most people, a compound microscope in the 100× to 400× range is plenty.
Researchers sometimes go further, using scanning electron microscopy (SEM) or an electron microscope to capture extremely high-resolution images of mite anatomy.
That level of detail isn’t necessary for a simple home look, but it shows just how much structure these tiny creatures actually have.
How to View Dust Mites Under a Microscope
Getting a good look doesn’t require a lab. A simple microscope to see dust mites and a basic home setup work fine.
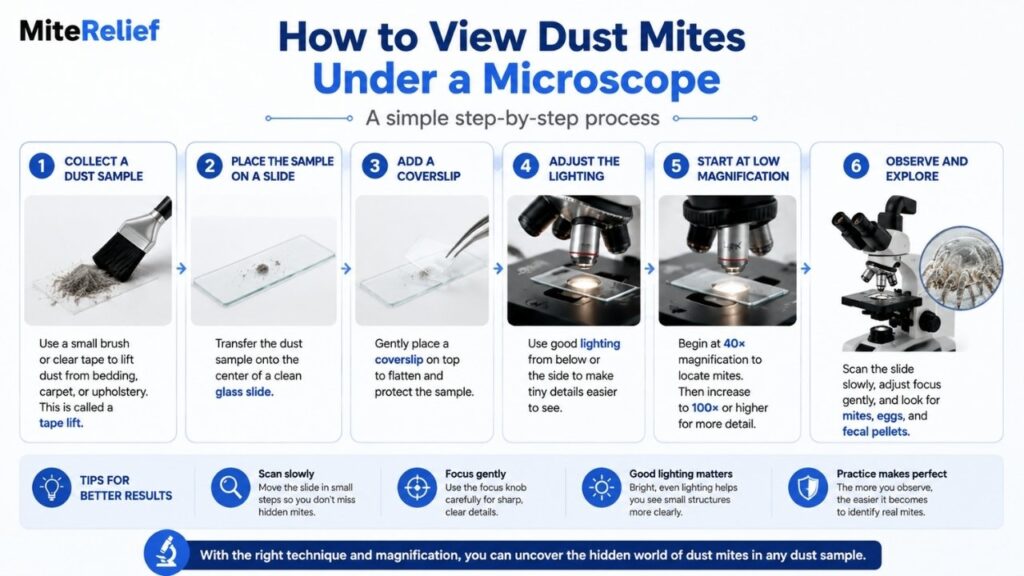
- Collect a dust sample. Use a small brush or a piece of tape to lift dust from bedding, carpet, or upholstery. This is often called a tape lift.
- Place the sample on a slide. Set your dust sample onto a clean glass slide.
- Add a coverslip. Place a coverslip on top to flatten and protect the sample.
- Adjust the lighting. Good lighting from below or the side makes tiny details easier to spot.
- Start at low magnification. Begin at 40× to locate mites, then slowly increase to 100× or higher for a closer view.
- Scan slowly across the slide. Move the slide in small steps so you don’t miss a mite sitting just outside your current view.
- Adjust the focus knob gently. Small turns bring hairs and legs into sharp focus, while large turns can blur the image completely.
Patience matters here. A single slide can hold dozens of tiny particles, and it may take a few minutes of careful scanning before you spot an actual mite among them.
Dust samples are usually collected from common dust mite sources found indoors, and you can learn more about where those samples tend to come from in Where Do Dust Mites Come From?.
What Can You Learn From Looking at Dust Mites?
Looking through a microscope isn’t just interesting; it’s genuinely useful. Microscopy lets you connect what you’ve read about dust mites to what they actually look like in real life.
You’ll start to recognize their body shape, legs, and hairs on sight. You’ll also get better at telling mites apart from random dust particles, which isn’t always easy without practice.
This hands-on approach works much like using basic laboratory equipment. A high-resolution view can help you identify what may be present in a dust sample, rather than just a description on a page.
What Can a Microscope Reveal About Dust Mites?
A microscope can show you a lot, but it’s important to know its limits too. It clearly and directly reveals the physical structure of house dust mites: their shape, legs, and other body parts.
What it can’t do is measure your body’s reaction. Seeing a mite under a lens tells you it’s there. It doesn’t tell you whether allergens from that mite will trigger allergic reactions in you or anyone else.
In other words, a microscope shows physical mites, while allergy tests measure sensitivity. Seeing mites under a microscope is different from checking sensitivity with a mite allergy test.
What Can Look Like Dust Mites Under a Microscope?
Not everything tiny and pale under a lens is actually a mite. Several other things can cause confusion.
- Fabric fibers: Thin strands from clothing or bedding that can curl and look leg-like
- Skin cells: Flat, flaky bits of shed skin, often mistaken for mite bodies
- Dust particles: Random bits of debris with no legs or moving parts
- Mold particles: Small clumps or strands that can look like body segments
- Other tiny organisms: Small insects or fragments that share a similar size range
The easiest way to tell a real mite from debris is movement and structure.
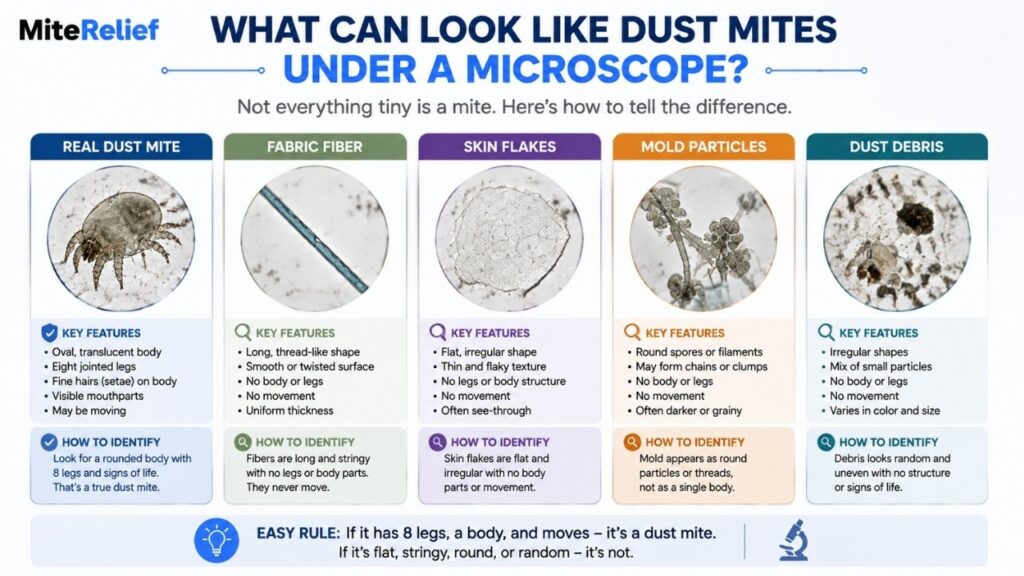
A true mite has eight distinct legs attached to a rounded body, while fibers and skin flakes stay flat and still with no clear body parts.
Knowing these look-alikes matters. Careful identification helps you avoid mistaking ordinary particulates for a real mite, which keeps your observations accurate.
Frequently Asked Questions (FAQs)
Can you see dust mites without a microscope?
No. Dust mites are far too small for the naked eye to pick out. You need at least some magnification to spot one clearly.
What magnification is needed to see dust mites?
A basic outline appears around 40×. For clear body details, 100× works well, and 200×–400× shows the finest features like setae and mouthparts. Most home viewing needs don’t require anything higher than that.
What do dust mites look like under a microscope?
They appear as small, translucent, oval-shaped creatures with eight jointed legs and fine body hairs. Their body is split into two main sections.
Can a digital microscope see dust mites?
Yes. A digital microscope can capture and display dust mites clearly on a screen, and it works well for both 40× and higher magnification ranges.
What do dust mite eggs look like under a microscope?
Dust mite eggs appear as small, smooth, oval shapes. They’re usually found near or on the mite itself, or scattered close by in a dust sample.
What To Read Next
Conclusion
A microscope for dust mites turns something invisible into something you can actually study. With enough magnification, their legs, hairs, and body shape all come into clear view.
Just remember that seeing a mite is different from testing for an allergy. Visual identification helps you understand what’s living in your dust, but it doesn’t replace a proper mite allergy test.
Whether you’re using a basic compound microscope or a screen-based digital microscope, the process stays the same: collect a sample, prepare your slide, and start at low magnification before working your way up.
Medical Disclaimer
This content is for general informational purposes only and is not a substitute for professional medical advice, diagnosis, or treatment. Individual health needs can vary, so speak with a qualified healthcare professional about allergies, asthma, skin reactions, medications, or other symptoms. Seek prompt medical care if symptoms are severe, persistent, or getting worse.

Umar Farooq is the founder of MiteRelief, a resource for dust mite control and allergy prevention. After battling allergen sensitivity, he started creating research-backed guides that turn complex indoor air quality science into practical, affordable solutions anyone can implement.